chalkboards...
The other day, while at JoAnns, I saw something that caught my eye...
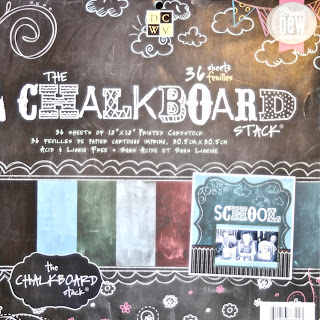
It's a chalkboard cardstock by Die Cuts with a View...
It is a double sided cardstock with a chalkboard like finish that is very slightly textured. As you can see, the pack contains several colors.
Now, of course, I had to try it!
The first thing I did with it was simply test out how the products I use all the time work on this new surface... I thought I'd share my findings with all of you.
*no one is paying (in money or product) me to write this, I went out to the store and found it and wanted to share. =)*
I chose to work with the black to get a good sense of how light colors work on it...
First up we have a Perfect Pearl mist... On regular white cardstock you get an even coverage of shimmer. On the chalkboard paper, you will notice you get pools of shimmer. I like the effect, but if you are looking for an over all even shimmer, the mist isn't the way to go with this.
Adding shimmer can be done though! Here is a look at 5 colors of Creative Inspirations paint on both white cardstock and the chalkboard. You can see that even the dark Sapphire color shows up beautifully! And the shimmer is fabulous! It does take longer for the paint to dry on the chalkboard. You can use a heat gun to speed up the drying time though.
Speaking of paint... here is white acrylic paint on the bottom and my whitewash on the top. (I left the middle blank for comparison.) They both work beautifully!
On to inks....I didn't bother trying dye inks with this because of their translucent nature, they just don't work on dark backgrounds. I still need to test them on a lighter color chalkboard paper...
Here is a sample of Colorbox pigment inks... I LOVE how beautifully the Frost White shows up! The other colors look great too. (again because of the dark background I'm using, I stayed with lights and brights... on the lighter chalkboard colors you could use the darks.)
And Colorbox chalk inks... (sorry, I forgot to stamp the white paper with the blue ink..) As you can see, some colors work, some just don't work very well... The Orchid Pastel (pink) is amazing though, isn't it!
I had to try out embossing powders... and let me just say they are beautiful! The chalkboard paper just seems to make all of the colors more intense and beautiful! You really notice the difference with the gold. I also like how you can still see the black well, and you can even see the clear one as a fabulous ghost image!
I love the look of dry embossing... This paper did fabulously! The embossing is crisp, and you can gently sand off the raised area for a bright white core. It is a beautiful contrast! Be aware, that deep embossing may cause the surface to "crack" slightly right around the raised edges. You can see that a little at the very top of my image... tiny cracks of white are showing on the edges of the circles. However, a lot of papers will do that, and it doesn't bother me too much.
I also tried it with punches, and found that it was very easy to punch, and the cuts came out looking great!
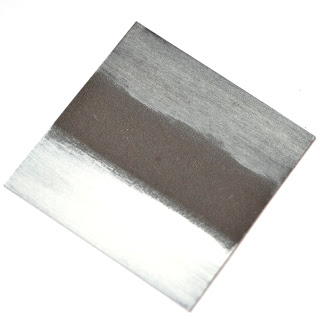
And, of course, since it is call Chalkboard paper, I had to try chalk.. the chalk wrote on it very smoothly... and YES, you can erase it, just like a chalkboard. =)
Well, as you can tell, I'm enjoying my new chalkboard paper. I'm sure you'll see it pop up in projects in the future.
Enjoy!
~Kassi


Comments
Post a Comment